News for Editors
How can I help with the Technical Manual?
We need a couple of types of people, and no, you don't necessarily need to be an expert on these cars. So, what roles do we have?
Expert... someone who actually knows a lot about a (part) of the Pagoda. We have a number of recognised experts here on the forum, and we all know them. They produce basic content and knowledge, often in forum messages or "Tours". They add photographs., explain procedures and so on.
Knowledge gatherer... these are people with a thirst for information. Over the years they have culled so much together, they have become experts themselves. If you need to know what was historically correct, they know. If you need a part number, they have it. The entire section on Data Cards and Codes was put together by someone like that.
Chronicler... these are people who frequently have done a complete, body off, nuts and bolts restoration of their cars, and kept meticulous records and photographs. We have one or two of these on our site too. You need to know a detail (like how the heater box fits... they have a picture). We have some of these people too.
Writer... guess what, someone who writes plain, understandable English. Is able to remove unnecessary noise. Make it succinct, simple. We need more of these people, because when the rubber hits the road, writing it up needs to be done.
Editor... someone who puts it all together. Gets information from the forum and other sources. Pushes the expert to deliver. Gets info from the knowledge gatherer, and photographs from the chronicler. And puts it all together in the right place on the Wiki, with the right layout. Adds internal links. Is organised. Gets the best out of others.
Are you one of these people? Please start contributing!
Topics
- New features available
- Editing the manual, Yahoo stuff
- Structure of the manual
- Images and diagrams
- On Image size
- Attaching Images
- How to make a manual
- How to help
- Internal layout
New features available
As of recently we have added a number of new features for formatting and layout. These are detailed here.
Restricted content
Although most of the content of the manual is available for reading to the general public, we have created a section for restricted content, i.e. premium content for full members only. They will need to login with their e-mail address and password before the content can be read. At the same time, as full members, they will have edit capabilities also.
To add restricted content, just visit the Premium Content page and create subpages as always. They can be linked to from anywhere in the Wiki but will prompt for a login before display.
Extended Styles
Additional styles
Postit-notes, side-notes, tip, important, and warning styles for callouts, text styles, additional colours and outline-lists
We now have extended WikiStyles available. For which those are and how to use them, check WikiStylesPlus.
Sortable and Zebra tables
We now have two additional table styles available, next to normal tables. Zebra tables show alterating rows with different backgrounds, so that on tables with many columns it is easier to see which items belong together.
||class=zebra border=1 ||!Name||!Age|| ||John||21|| ||Peter||47|| ||Karl||18|| ||Christel||38|| | ||||||||||
|
Sortable tables can be sorted by clicking on any column heading. Clicking twice will reverse the sort order. These tables are identified by a yellow heading line. Note that when the table is sorted the alternating background will be sorted away too.
||class=sortable border=1 ||!Name||!Age|| ||John||21|| ||Peter||47|| ||Karl||18|| ||Christel||38|| | ||||||||||
|
Editing the manual, Yahoo stuff
Now that all of the old Yahoo content has been added to the Technical Manual, it is time for us to start editing this manual properly. The purpose of a Technical Manual is to be a single, authoritative, precise and factual source of information for our cars. The stuff from Yahoo and indeed our Forums contains some of that: but it also contains noise, opinion, conjecture etc. The point of the manual is that we remove all that noise, and leave it with well-structured, factual content.
Note that some of the thinking presented in the forums is useful all the same: it just makes the manual too long and imprecise. We do not delete the forum content, one can always read back what was said there.
So, what do you need to do to update the manual:
- become really familiar with what is in the manual already, and its structure -- This also will help you to add cross references later
- understand how a section is structured (with its components and overall description) and how detailed components are described (part number, features, differences from model to model etc)
- get very familiar with mark-up (use the sandbox), it's really easy
- before tackling a particular topic, really research the topic in the current forums. Create a document from the forum content, with URL's to pictures, and in the correct order. Just use Notepad to do this -- you can do this off-line
- then Cut-and-Paste that text into the Wiki
- then add the text already in the Technical Manual from the Yahoo site and merge that
- move text that really belongs elsewhere and append it to that section (unless when that section has already been completed, and it does not add any further value, then just delete it)
- remove questions. If factual answers are received, move the statement to the top
- remove personal names
- if opinions are given, choose the one developed as the "best" answer, or indicate that there are alternatives
- split factual descriptions and procedures. Move procedures (i.e. how to do things) into an appropriate maintenance section. If you have multiple descriptions of a procedure, merge them and make the description text as clear as possible
- use lots of bullet or numbered lists
- insert diagrams
- add lots of cross references to things elsewhere in the manual
- don't worry about deleting text from Yahoo or the forums from this Wiki... but do not delete structure. The Forums will still exist. The key point is that the Technical manual should become the definitive source on the car... and even that can still be changed easily!
- Check all URL's, addresses and prices, to make sure they're accurate. If you quote a price, be sure to stick a year behind them, like so: �200 (at 2007 prices).
- Check your spelling
Structure of the manual
Naj wrote:
 e.g: group:

 25 clutch
 26 manual gearbox
 27 auto box
 32 springs & shocks
 35 back axle
 42 brakes
 47/2 electric fuel pump
With a Wiki there's no point in trying to copy a structure. Wikis are a collection of pages that are linked and grow organically. As such they are ideal for collaborative effort. The structure, certainly initially, as the manual is evolving, is very fluid. Also, Wiki's are notoriously unsuitable for numbered sections.
Once the manual takes shape we need to add a trail, to allow us to create an order in which the manual can be "read" or printed sequentially. The order of this trail can very easily be the same as that of the Big Blue Book. This can very easily be added afterwards.
Images and diagrams
the uploading feature is not yet enabled. When that is done, I'll post an update here.- uploading is now enabled. Once you are logged in, you can use the Attach command to upload a picture. Currently only files ending in .jpg, .gif or .png are accepted, of a maximum of
100250KB4MB. If more file types need to be enabled, please contact me. - for information on formatting images on the Wiki page, refer to PmWiki.Images.
- for information on how to upload images, refer to Uploads.
- to use photographs or images already uploaded in the forums work as follows (this only works for old pictures, not for the new style attachments):
- locate a pre-existing picture in a forum topic.
- Once your picture is available in the forum, open the attachment and in the new browser window or tab, copy the URL from the address bar (click in the address bar, and then do CTRL-C to copy it, and paste this into the edit window in the Technical Manual with CTRL-V.
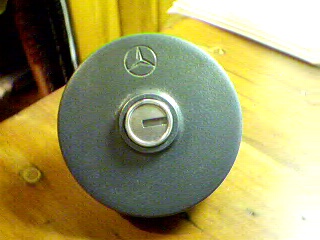
- a literal text like this will appear http://www.sl113.org/forums/uploaded/hands_aus/20041212663_LockFuelCap_6.JPG which in the Wiki will expand into a picture as shown below.
- for formatting, go to PmWiki.TextFormattingRules and print it out, put it next to your PC.
On Image size
mdsalemi asked:
At the time this question arrived the Wiki also has a hard limit of 256K 4MB for uploading photo's. However, it is a limit the Pagoda SL Group controls and can change. The reason there is a limit is because we have a finite amount of disk space. The allotment for our website has increased it over the last couple of years. We can now store 50GB (used to be 500 MB, then 5GB) and we're currently only using some 30GB of that. So we could increase the upload limit for the Technical Manual.
A second aspect of the 80K limit is download speed. Even with high bandwidth in use today a 1MB picture takes considerably longer to load than an 80K picture. We still have people using dial-up. Also it puts a bigger strain on the server used, slowing it down. When someone (or multiple people) are doing a Search on the Forums, everyone is subjected to an appreciable delay. That's why we do not just increase the file size to 1MB.
However, no photograph used for the technical manual would have to be 4MB in size. A 1MB or less JPEG could be produced from most images, where there would be no quality issues. Often it can be cut it down to 250K. Just use these instructions:
- The typical photograph, taken with your digital camera, is between 2 and 6MB large. That is far too big for a web-site. Most people view web-sites on a screen either
800x6001024x768 or 1920x1080 pixels. A universally applicable maximum display size for a picture is therefore to make the largest side (either vertical or horizontal, depending on picture orientation) 1024 pixels. Frequently the other side will end up being 768 pixels, or something close to that. This is an excellent size for our site. - Crop your picture. For this manual, only select that area which we are interested in.
- Just by doing this, picture size will be reduced dramatically. Use your favourite software to save your picture as a ".jpg" file, and verify its size. Sometimes you can do this in your editing package, sometimes you need to right-click on "Your computer" or "My Pictures" to verify that size. If it is over 1MB you need to further reduce that size. The easiest way is to perform a "Save As..." operation on the original file, and then to select an Image quality of say 80% (or 8 out of 10) or smaller to reduce the size below 1MB. The smaller the percentage, the better.
- Note that this jpg compression process typically leaves a better image than if you try to achieve the same result in another fashion. These operations can be performed using Adobe Photoshop, Microsoft Photo Editor, the GIMP and other packages.
- If you use Windows and need an excellent free-of-charge package, I recommend XnView. This package is easy to use and leaves camera information in the .jpg file intact in editing sessions. When using the "Save As..." function select the button "Options" and then use the JPEG quality lever to fit within the 1MB.
- If that still does not get the file small enough, then reduce noise, number of colours, brightness. Very large contrasts typically result in large files. However, as this reduces quality, apply these measures judiously.
The upload limit on the Wiki has been increased to 4MB. On the forums it is currently 8MB per attachment, 4 attachments per post. However on the forum the picture is resized automatically to a maximum size of 1280 pixels (horizontal or vertical). Most pictures end up being between 250-350KB. If there is an occasional picture for which the quality cannot be guaranteed, the administrator (admin@sl113.org) will be able to upload it anyway, regardless of size. The same holds for pdf's and other documents. Instructions for uploading pictures on the Wiki are here: Attaching Images
Attaching Images
How to attach an image to the Wiki is described in detail here: Uploads or Attachments.
How to make a manual
JonB commented:
This is exactly the key point of what we need to do in producing a manual. We need to take the knowledge in the forums, and structure it, piece by piece, to make it into a manual.
We'll make wrong turns, we will re-structure the document many times, and we will add or modify it as we learn more. We need to make it less of a list of posts, and more a body of knowledge. This is a major effort, which is why we need your help.
A Wiki is a great platform for doing this collaboratively. Multiple people can work together on the same piece of text, or on separate parts of the manual. We can change the structure and layout as we learn more. This manual will always be draft... and always up-to-date. Only when we take a �snapshot� for printing, then we have created a temporary final version.
So jump in, and help!
For further thoughts on this, have a look at the Edit Notes.
How can I help
Al commented:
This is where a Wiki is great. You can contribute, even if it is only little things. You do not need to set aside lots of time... if you've got 10-20 minutes, you can add something useful to the site. You certainly do not need to submit a complete and coherent dissertation. Any small snippet will do. Start with a small subject, and see it grow. It's probably hard to tell right now, until there is more content there, but a Wiki allows the manual to grow organically.
Don't worry about screwing things up. We can revert back to previous versions of posts.
Don't worry about spelling or grammar, if that's not your forte. We have lots of people who know less about these cars, but are prepared to help out with proof-reading or correction.
Don't worry about not writing an eloquent piece. Just putting in your thoughts, telegram style, is useful. Someone else can make nice sentences out of it.
Just worry about providing the right insight. That you can do. You have the experience.
Internal Layout
A good example of how to structure a major body of text is in the item Data Cards and Codes. Select Edit in the menu on the left to see what it looks like internally. You may want to copy bits of this to your own page as an example.
Similar starting points for new text are New Section for a major topic, or New Component for a smaller part. Again select Edit in the menu on the left to see what it looks like internally. You may want to copy bits of this to your own page as an example.
Main.TrailIndexPage